
Why We Only Sell At Producer ONLY Farmers Markets
Matt and I were in the greenhouse recently discussing how to start off our 2021 blog series. As we were talking, we began discussing the top 5 questions we get asked during the market season. After some deliberation we agreed that in the beginning of our season we get asked, why we don’t sell at our hometown farmers market?

Matt and I were in the greenhouse recently discussing how to start off our 2021 blog series. As we were talking, we began discussing the top 5 questions we get asked during the market season. After some deliberation we agreed that in the beginning of our season we get asked, why we don’t sell at our hometown farmers market?
Instead of simply answering the question we try to use this as an opportunity to possibly educate about producer only markets. We often ask a question(s) in return. Do you know what producer only farmers markets are? Did you know that not all farmers markets require the person selling at the market to produce or create what they are selling? We are often met with a puzzling look of confusion. Most of our customers have never thought about where the goods on vendor tables at farmers markets come from. I, just like many of our customers, have assumed that everything on a table at a farmers market is grown or created by the person selling it. This, unfortunately, is not true unless you attend a producer only farmers market.
As local farmers we take great pride in growing, baking and creating everything we sell. We work extremely hard to provide LOCAL, fresh produce and other goods to our customers. We also believe that the intent of a farmers market is for local farmers to sell their local goods and wares, not someone elses’.
Now, before I go any further I want to make a quick note about my last statement, as there are exceptions to some vendors selling someone else’s items. The first being farmers that hire someone to sell their items at the farmers market as the farmer is needed on the farm. The next being, a producer only farmers market making exceptions for vendors to come in with products not belonging to them to fill a void at the market. I have seen this with dairy items many times. The market will still require some due diligence, but will make exceptions to allow a variety of choices for market customers

Sedalia Area Farmers Market
Producer ONLY farmers markets have a board of directors that create rules to be followed by the market manager, vendors and etc. These rules require that vendors have their farm, bakery or home inspected regularly by a committee to ensure what they are selling at the market they grow, bake or create. Vendors are also required to reside within a certain mileage to create only local options to customers.
Non-producers farmers markets are markets that allow goods to be sold that are not grown or created by the seller. There is usually little oversight regarding what you bring. Typically, but not always these markets do not have a board of directors to create rules and often, but not always, do not have a market manager. Vendors can buy produce or goods from someone or someplace else and then bring them to a market and re-sell them. You might be thinking, can that possibly be profitable? The answer is, yes.

Produce Auction in Missouri
An example of reselling items would be purchasing large quantities of produce from a produce auction and then taking your purchases to a farmers market and selling this produce at a higher price point. Now, before I go any further, is there anything wrong with this….. the answer is no. Is the produce bad…. the answer is again no. I have purchased produce from farmers markets where produce is sold by a third party and I haven’t been disappointed.
Where we, as local farmers, have an issue with this falls under more of an ethical heading and maintaining the spirit of what a farmers market is for. When I go to a farmers market, I go with the intent of supporting a local farmer or creator. Someone who has spent hours upon hours choosing seeds, potting mix, perfecting planting schedules, battling weather and pests and still showing up with produce. This same farmer is handling their own marketing through websites, social media, signage, online stores and blogs. They are also fielding phone calls, creating logos and eye catching market table set-ups, attending continuing education conferences to make their farm and products better, all while following federal, state and local rules placed upon them.

Painstakingly seeding carrots by hand before our seeder purchase.
This farmer is the one who can talk to me about the variety of tomato they are selling and give me more information than I expected all while being excited about it! I don’t know about you, but I want that farmer. I want to support the farmer who is putting in the work to run every aspect of the business and still be excited about it. That’s the point of a farmers market, right? To connect with your local food and farmer.
On a final note, I want to mention again, there is nothing wrong with buying a product from a non-producer market as long as you the customer, is informed of what you are purchasing and who or what you are supporting. If your intent is to support local business, then by all means purchase away! If your intent is to connect with your farmer, inform yourself and ask questions. You’ll find who you’re looking for pretty fast!

New Beginnings
Last year we decided to enter into a new venture outside of produce. Lamb is not a commodity well served in our market area and we have wanted to add meat, outside of chicken, to our farm for sometime.
WARNING: I want to warn those opening this post that there are images at the bottom of an animal giving birth. We did not post pictures throughout the blog as we normally do as we wanted to give a warning ahead of time. While we as farmers believe they are appropriate and part of the journey of being farmers and raising livestock we do understand that not everyone will. Thank You.
Last year we decided to enter into a new venture outside of produce. Lamb is not a commodity well served in our market area and we have wanted to add meat, outside of chicken, to our farm for sometime.
In early 2019 we purchased only two lambs unsure if we really wanted to add 4 legged livestock to the farm. We quickly figured out we loved having sheep and found ourselves with a small flock of 10 within a few months.
We were lucky and were able to find a local farmer that would contact us when he had available bottle lambs. He wasn’t up for bottle feeding and we had 3 eager kids who were…. and their mama may have been eager too.
Fast forward to June 2020 and we have a small, healthy, beautiful herd. The ewes are sweet and kind and come running when they hear the slightest rattle of the gate or grain bucket.
Matt had mentioned to me at the beginning of March that he thought our oldest ewe may be pregnant. We had not separated the buck from the heard at this point. While our buck does like to be a trouble maker on occasion he isn’t mean spirited and has done well remaining with ewes.
We watched as the oldest ewe, born in January 2019, became larger and two weeks ago we noticed her teets were quite swollen. Four days later Matt was doing our morning chores and happened to walk up just as the delivery of our first lamb on the farm began.
The first time mama did a beautiful job delivering her. We were amazed that it only took 45 minutes from seeing the tips of the lambs hooves being born, to her being fully delivered, to her standing and then nursing.
Less than 48 hours later and that little lamb is darting quickly around her mother, nursing like a champ and acting as if she has been a part of the herd the whole time.
We are excited with this new addition and what this means for our herd. We are hoping to have a second season of lambing this fall as the remaining ewes turn a year old this month. We will be slowly building the herd, making careful additions and selecting qualities that will bring our herd to where we desire.
In the meantime I will be enjoying the sweetness of this adorable little lamb and laughing at her quirky, spunky self as she runs and jumps in the pasture trying to entice the others to join in her fun.


Garlic Herb Tortelloni
Who’s ready for a new recipe post?? WE ARE!
It’s been a month since I last posted and honestly, it seems longer. With warmer weather and produce harvested daily we have been putting in at least 60 hours a week. My easy winter/early spring blogging is now replaced with nothing short of controlled chaos on the farm. It is exhausting and overwhelming on some days but, we love it regardless.
On to our recipe!
A little over a year ago I received a free trial with Hello Fresh. We are interested, in the future, to put together market meals. These would be full meals with all of the needed meat, vegetables, some spices and etc for a quick, healthy and locally sourced meal. Hello Fresh does all of this through a delivery service but, without the sourcing of local ingredients. We loved the ease of everything in one bag and pre-portioned with recipe cards attached.
The one meal that we have made over and over has been the Garlic Herb Tortelloni. It is not only easy but, delicious.
Here is what you need:
1 package of Tortelloni. I like to buy the family size pack in the refrigerated section at Aldi’s.
5 tablespoons of softened butter
Olive Oil - 1-2 tbl.
2 small/medium size Zucchini (yellow or green) We used yellow as it was ready to be picked.
Tomatoes (Cherry, Roma or another favorite variety will do) 1 larger slicer or 15-20 cherry tomatoes
2/3 cup of Panko Breadcrumbs
1/2 cup Parmesan Cheese
2 tsp Italian Seasoning
1-2 tsp Chili Flakes (optional)
salt/pepper
2 cloves of Garlic - or Garlic Scapes (if your using locally sourced garlic please note you may need as little as 1/2-1 clove. Our garlic is considerably fresher than the store and really gives you tons of flavor with so much less. If your using Garlic Scapes I like 3 whole scapes in ours.)

Preheat your oven to 450 degrees.

Prepare and cut your zucchini and tomatoes (if using a slicing tomato) The zucchini we cut in half length-wise and then again crosswise making half moons. The tomato can be cut into wedges but, in my image, which is taken after roasting them, you can see I used cherry tomatoes and didn’t do anything to them.
Line a baking sheet with foil (optional). Place your prepared zucchini and tomatoes on the baking sheet. Drizzle the zucchini and tomatoes with olive oil and then sprinkle salt and pepper on top.
Place in your preheated oven and let roast until tender. 15-20 minutes.

Next, take 4 tablespoons of your softened, not melted, butter and mix in the italian seasoning, garlic or garlic scapes and a 1/2 tsp of salt. You may add a pinch, or more of chili flakes if you like a little extra heat.
NOTE: If using scapes and you haven’t used them before simply chop up the scapes thinly, similar to onion chives and add them to the butter.
Once well mixed set aside.
Bring a medium pot of salted water to a boil. Once water is boiling add tortelloni and cook until al dente.
Once the pasta is done, turn off stove, drain water and add tortelloni back to the empty pot.
Scoop your garlic butter mixture into the pot with the cooked pasta and let the garlic herb butter coat the tortellini completely. The butter should melt quickly from the warmth of the cooked pasta and it will smell devine!


Cover the pasta with a lid and set aside.
Place a small pan on the stove. Turn the burner on to low/medium heat and place a tablespoon of butter in the pan.
Once the butter is melted and coats the bottom of the pan place 2/3 cup of Panko Breadcrumbs in the pan. Cook until the bread crumbs are toasted and a nice darker brown color.


Divide the tortelloni between bowls. This should make four servings however, we usually only do three…. we really like this dish! Top the tortelloni with the roasted veggies, sprinkle with Parmesan cheese, the toasted breadcrumbs and ENJOY!!
This dish is the first dish we made with our first harvest of zucchini and cherry tomatoes this year. There are never any leftovers when I make this.

Completed dish from Hello Fresh.
While the image from Hello Fresh is much more appealing than mine (thanks for letting me down android camera) the meal still tastes delicious and is a nice addition to any home dinner menu.
On the farm we currently have zucchini, garlic scapes or garlic heads and lots of tomatoes. We would be thrilled to help provide you with locally sourced items to complete this dish.
Reach out to us via email, Facebook or Tuesdays and Fridays at the Sedalia Area Farmers Market from 3-6pm.
Enjoy!!
Using One Ham for Four Meals Part 3 & 4.
At this point your ham should be quite a bit slimmer and likely only have a few slices of easily pulled off ham, similar looking to my ham.
You have a few choices as to your final meals:
You can freeze the remaining cooked ham in covered airtight containers, heavy-duty freezer bags or tightly wrapped aluminum foil. If you have now cooked ham two days in a row and you are going for your third and fourth day of ham your family is close to being hammed out! Freezing the remainder for another day might be just the trick!
DISCLOSURE: As I was starting this post and collecting the images I wanted to use, I realized that having a 12 year old help take pictures is not a good idea. That being said, I apologize for my lack of ‘quality’ photos and honestly, the lack of photos of the process. The kid tried, what can I say!
At this point your ham should be quite a bit slimmer and likely only have a few slices of easily pulled off ham, similar looking to my ham.

This is our remaining ham after making both part 1 and part 2.

MMMM…. these are delicious and a crowd pleaser for sure!! My family LOVES them and we have to make two pans at a time. Visit, The Girl Who Ate Everything for the recipe!
Photo From: The Girl Who Ate Everything.
You have a few choices as to your final meals:
You can freeze the remaining cooked ham in covered airtight containers, heavy-duty freezer bags or tightly wrapped aluminum foil. If you have now cooked ham two days in a row and you are going for your third and fourth day of ham your family is close to being hammed out! Freezing the remainder for another day might be just the trick!
We use our third meal which, sometimes isn’t a dinner, in our breakfast sandwiches omitting the bacon or sausage and replacing with a slice of ham. We also make warm ham and swiss sliders… these little guys are sooo good and a favorite in our family. (See the image on the left for recipe details)
For our forth meal the ham should be free of pre-cut slices and you are left with chunks of ham still on the bone, this is the time for soup. If you have quite a bit of ham left on the bone we love using our slow cooker for ham and potato soup. You can head over to Dinner then Dessert for a recipe. One note, you don’t have to buy the ham cubed as her recipe says. Remove any easily peeled away ham from the bone and cube. You can also slow cook your ham bone overnight allowing any ham chunks to release from the bone making it easy for you to add to this soup. Use the ham broth from the overnight slow cook as your broth for the soup!
Today, we are going to talk about ham and bean soup. The simplest soup we make at our home and the perfect soup when I have minimal ham left on the ham bone.
First, get out that crockpot or Insta-pot.
Place your ham bone and chunks into the pot and then fill the pot three-fourths full with water.
Add dried Great Northern Beans. The amount of beans is up to you. We add the entire 1lb bag. The beans will expand by soaking in the moisture as the cooking process commences.
Seasoning is up to you as are any additional add-ons such as a bag of frozen vegetables or maybe you would like to add fresh celery and carrots. My husband is pretty much a ham and bean guy. No extras outside of a sautéed onion, the ham and the beans. I do add salt/pepper and a bay leaf or two. You can slow cook this overnight or start early in the morning. This will take a full 8 hours or a little more, to cook the beans through and allow the water and beans to soak in all that ham flavor.
After your soup is finished I remove the bone and peel any remaining pieces of ham off and add back to the soup. At this point your ham bone should be pretty much all bone and ready for the discard pile.
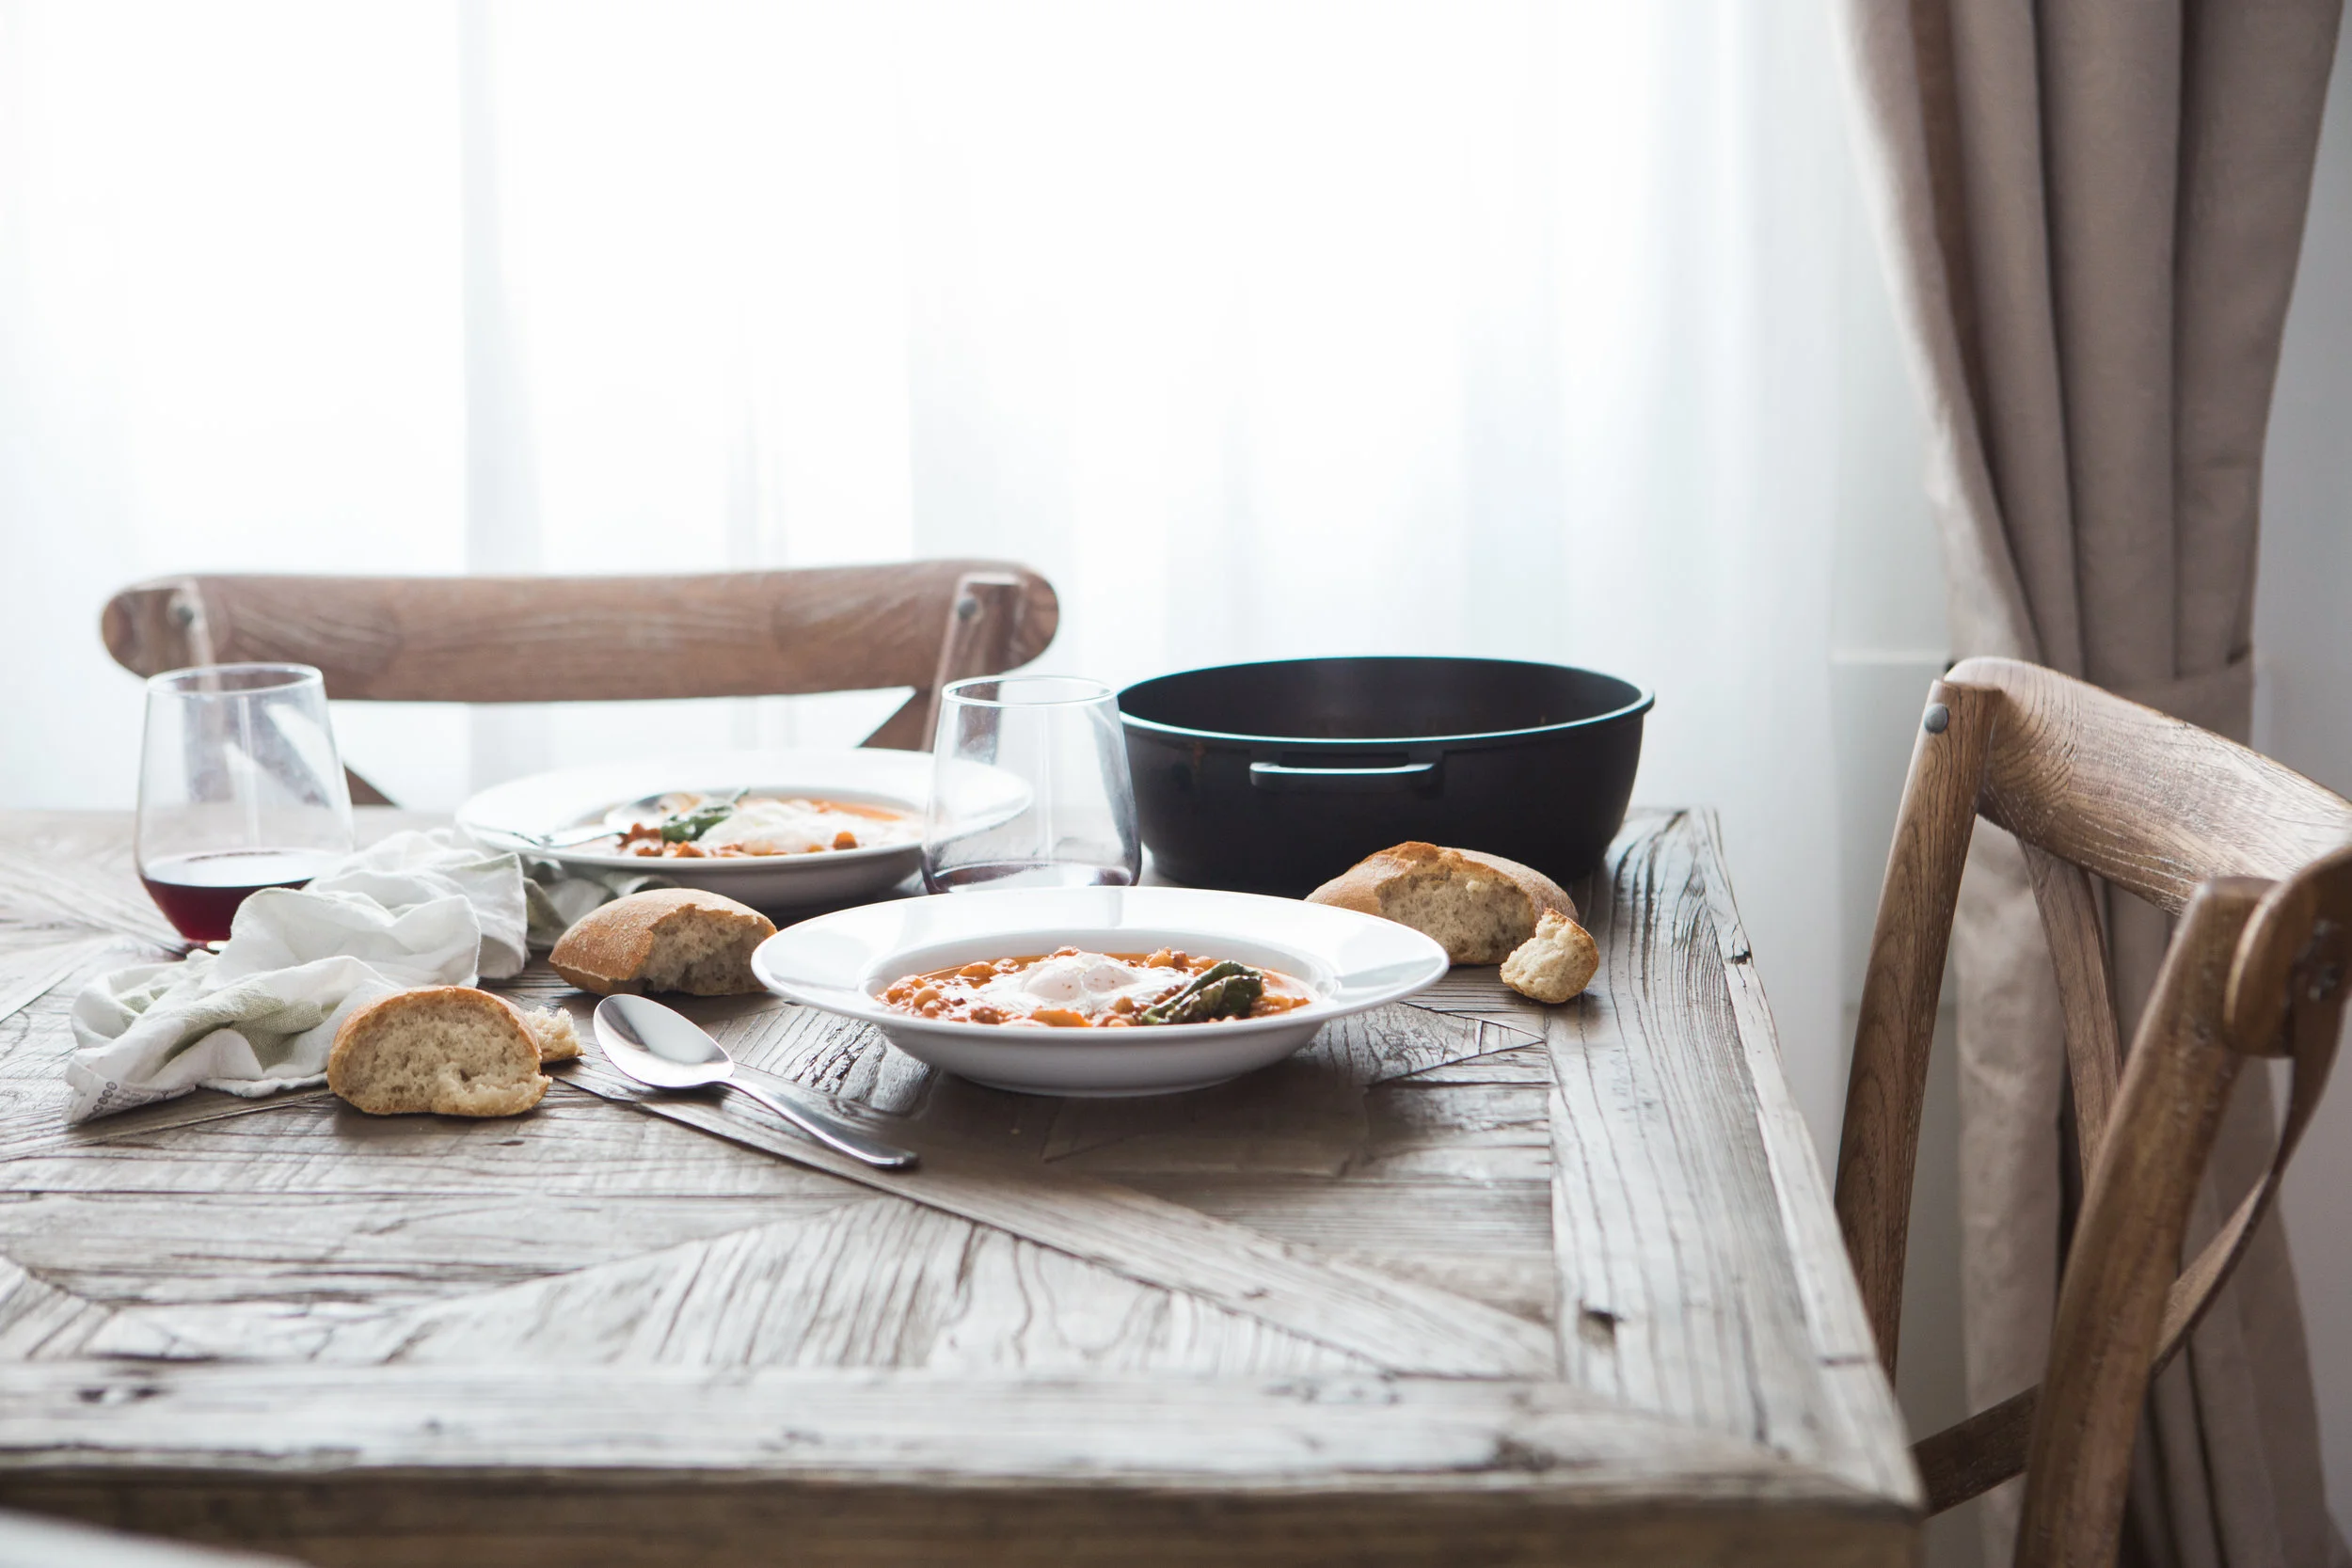
We also love to pair this soup with a cast iron cornbread or a baguette. If I could figure out the recipe for Panera’s Whole-Grain baguettes they would go beautifully with this soup.

Before the 8 hour slow cook process begins.

The final product. Also, not our picture but, a duplicate of what our soup looks like when it is done. The recipe at 4 Sons R’ Us is almost a duplicate of ours.
I hope you have enjoyed our last three blogs using a single ham over several meals. Utilizing a single ham or turkey is always a favorite of mine as it gives me easy pre-determined meals for at least 3-4 days. I will be posting recipes using a whole turkey in the near future however, I will be utilizing a lot of our fresh vegetables that are starting to be harvested as future recipes.
Please subscribe to our page if you haven’t already and receive emails when new blogs have been added as well as updates to our farm and additions to our farm store.

Using One Ham for Four Meals Part 2
Thank you for coming back for part 2 of, Using One Ham for Four Meals. Perfect timing with Easter two days away. How many are having ham? We are!
In the process of using ham for several meals, Ham and Scallop Potatoes is my favorite, especially on a chilly day. This hot and creamy dish is a hit with everyone in our family no matter the time of year.
Lets get started!
Thank you for coming back for part 2 of, Using One Ham for Four Meals. Perfect timing with Easter two days away. How many are having ham? We are!
Lets get started!
In the process of using ham for several meals, Ham and Scallop Potatoes is my favorite, especially on a chilly day. This hot and creamy dish is a hit with everyone in our family no matter the time of year.
Here is what you are going to need:
Onion - 1 large
Butter 4 tablespoons
Heavy Whipping Cream 2 cups
Milk 4 cups
Flour 1/3 cup
Leftover ham - enough for 3 cups of diced/cubed ham
Potatoes 4-5 medium/large
Mozzarella Cheese at least 2 cups
Salt/Pepper amount is up to your tastes
Baking dish 10x14
NOTE: I used a mandolin when thinly slicing the potatoes. A mandolin is inexpensive ($20 or less) and slices the potatoes to the exact thickness every time. This is important for even cooking throughout the dish. You can of course slice the potatoes by hand if you desire.

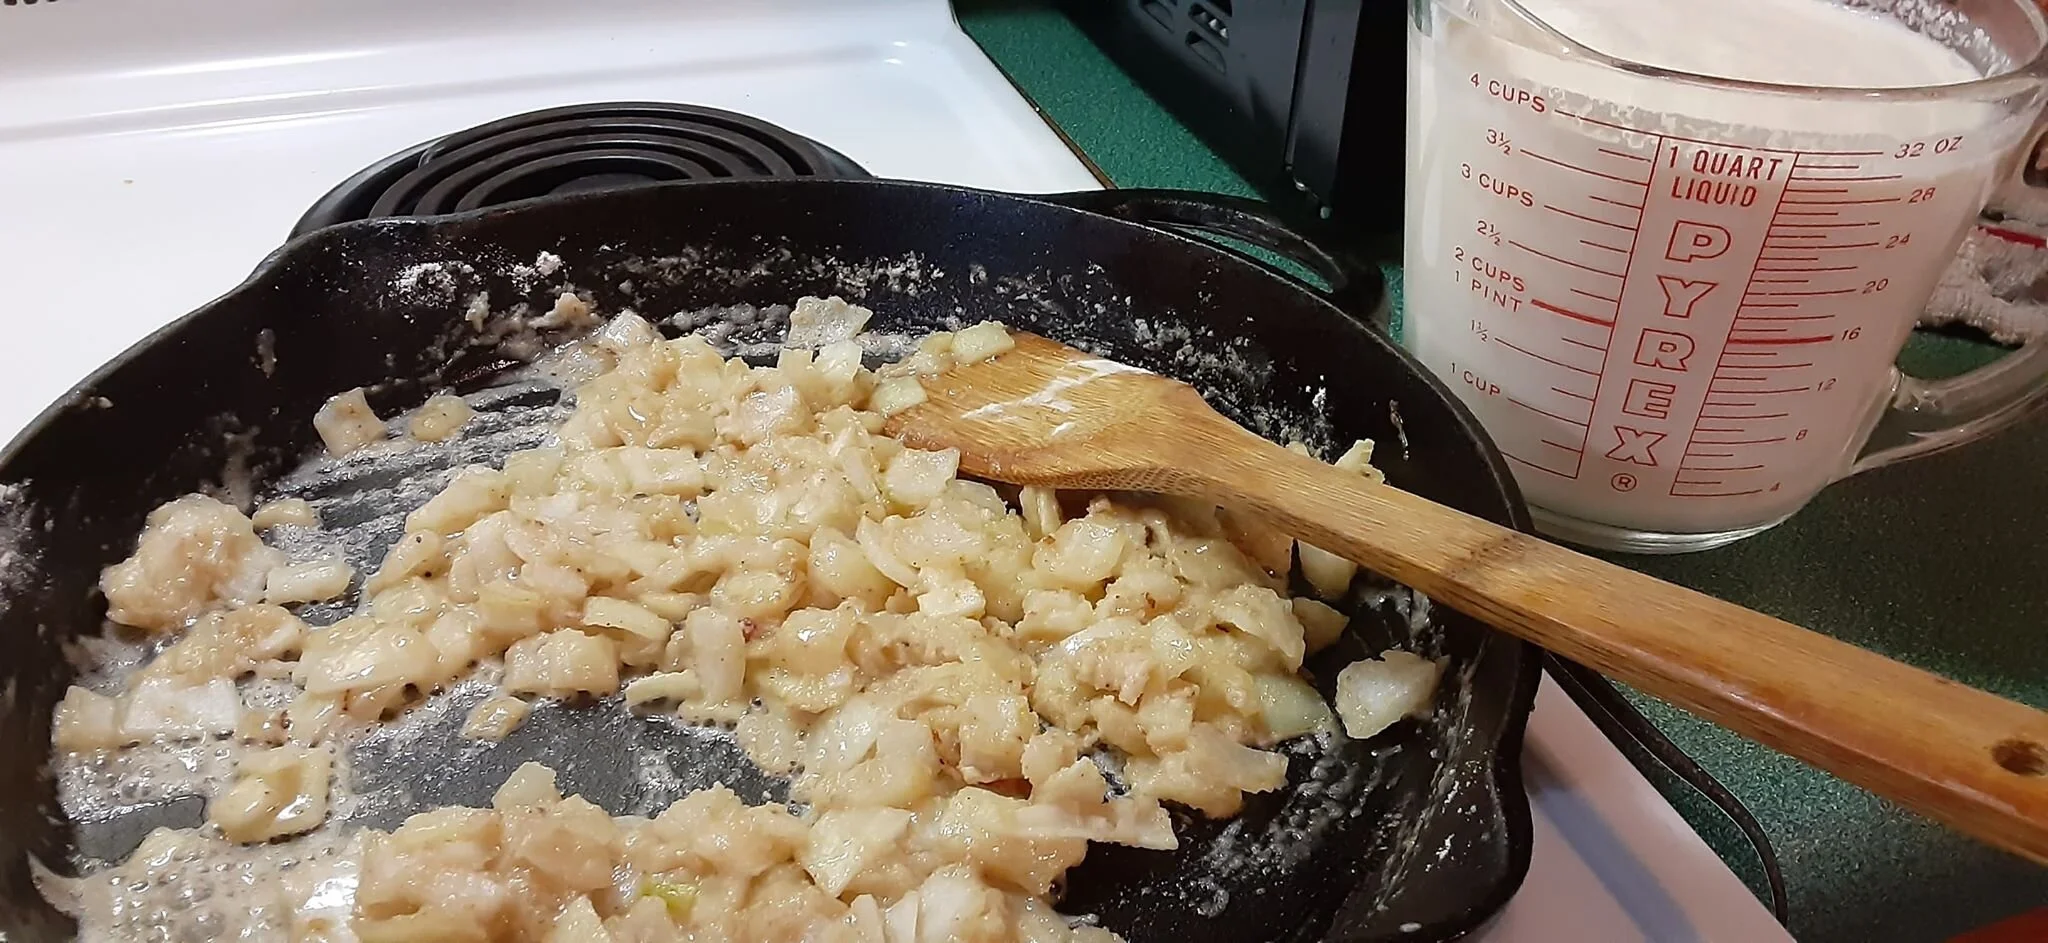
Starting with a chopped large onion and 3 tablespoons of butter sauté the onions in a skillet until translucent, this process will take 2-3 minutes.
Once the onions have become translucent add 1/3 cup of flour and stir everything in the skillet together. Continue to sauté until a golden brown color starts to emerge.
Once the mixture becomes golden brown add in 2 cups heavy cream and 2 cups of milk. You can substitute the heavy cream with half-and-half or whole milk. I use 2 cups of 2% milk but, you could use something else. I would avoid milk less than 2% as it is a little thin for this recipe.

Whisk the mixture together and continue to whisk frequently, this will discourage the mixture from sticking to the bottom. Keep the heat consistent at medium heat to continue reducing the liquid to allow the mixture to thicken.

Start of simmer still thin

End of simmer with desired thickness
Once the mixture is thickened remove from heat and set aside.
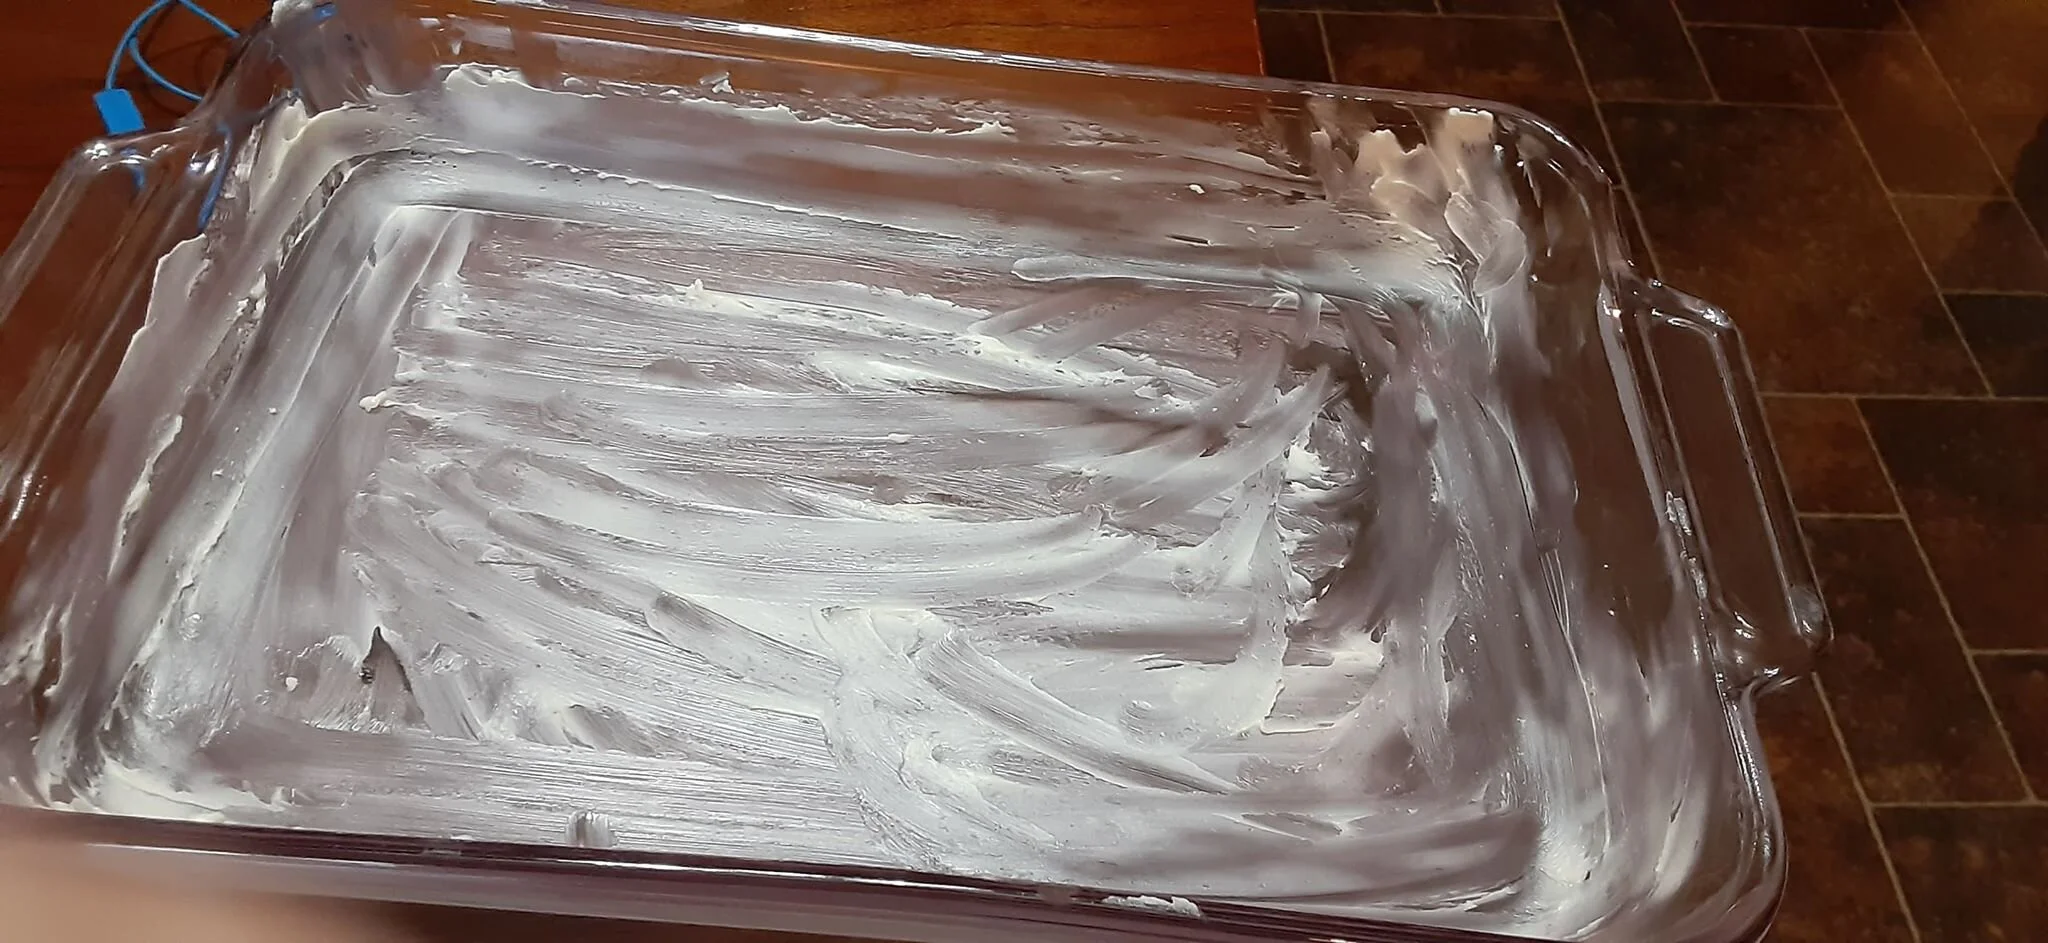
Grab your mandolin or knife, a cutting board, peeler and a baking dish. Use the remaining 1 tablespoon of butter and butter the baking dish to prevent sticking.
Peel 2-3 medium/large potatoes to start; you can always peel more as you go if needed.
Grab several ham slices and dice approx. 3 cups of ham.
Bring over the cream mixture from earlier, the shredded mozzarella cheese and those last 2 cups of milk.
Once all your ingredients are gathered you are ready to assemble.
Start by thinly slicing your now peeled potatoes either with your mandolin or knife. I like my potatoes to be very thin and almost appear translucent when held up to the light.


Lay one layer of sliced potatoes along the bottom of the buttered baking dish.
Now lay one cup of cubed ham. You can add as little or as much as you want. I don’t measure I lay it on until I think it looks good.
Next spread on the cream mixture. It will be a little gloopy (sorry, I can’t think of a better word to describe it). You wont be able to spread it very evenly but, it will spread during the baking process on its own.
Last, top with a nice layer of mozzarella cheese. (I realized later that step 3 and 4 are switched with how I did it in the pictures. Regardless, get it all on there in someway, lol!)
Repeat two more times to fill the dish to the top.
Get your milk back out and carefully pour approx. 2 cups of milk over the top. This will give the dish added moisture to allow everything to cook through. I don’t have an image posted of this step. Sorry!
Bake covered with foil @ 375 degrees in the oven for 40 minutes. Remove foil and bake for another 20 minutes until the top has a golden brown color.
Serve with a vegetable of your choice on the side and ENJOY! I’m telling you! It’s good!


I know I also posted this image at the start of this post but, it deserves to be shown a second time. It’s beautiful, creamy and oh so delicious on a chilly day!
This dish does take 30-45 minutes to assemble and 1 hr of bake time. I prefer to assemble this dish on a Sunday morning and pop it in the oven when we return from church. It is a perfect meal for a Sunday dinner as everything is assembled and oven ready. You could also put this dish together the night before and pop it in the refrigerator until you are ready to bake however, make sure the potatoes are thoroughly covered and the foil is on tightly. Peeled potatoes will brown when exposed to air too long.
One final note. I don’t talk a lot about seasoning with salt and pepper. In our home we have too many differing tastes. We normally season our own plates individually to reach desired tastes. You may season your dishes prior or like we do. It’s up to you!
I hope you enjoyed this recipe. Let me know how it turns out for you!
Keep an eye out for part 3 of, Using One Ham for Four meals. It will be posted soon!
If you enjoyed this recipe please subscribe below to receive emails when new recipes are posted.

Using One Ham for Four Or More Meals....
I recently went inside our local grocery store to pick up flour and sugar. I was not surprised to find how many items were missing. Shelves of chicken, hamburger, bacon and lunch meat were all empty. Spaghetti noodles, spaghetti sauce, ramen noodles, macaroni and cheese and cereal all gone. As I made my way toward check-out I was surprised to see several coolers full of ham, turkey, whole chicken and corned beef. I realized in that moment that now, during this time of crisis, is the time to talk about using whole cuts of meat over a period of several meals to feed your family.
I recently went inside our local grocery store to pick up flour and sugar. I was not surprised to find how many items were missing. Shelves of chicken, hamburger, bacon and lunch meat were all empty. Spaghetti noodles, spaghetti sauce, ramen noodles, macaroni and cheese and cereal all gone. As I made my way toward check-out I was surprised to see several coolers full of ham, turkey, whole chicken and corned beef. I realized in that moment that now, during this time of crisis, is the time to talk about using whole cuts of meat over a period of several meals to feed your family.
As market farmers we have gained intimate knowledge of the eating habits of others. I had noticed prior to COVID-19 that cuts of meat sold out faster than their whole counterparts. I made the assumption that the choice for cuts was largely due to convenience. It is incredibly easy and time saving to unpack a package of chicken thighs, sprinkle with seasoning and set them on a grill for dinner. I have since realized that convenience is part of the choice but, the knowledge of how to utilize a whole chicken, ham or turkey to its full potential is often not known.
I had wanted to start our recipe posts with something light and fun but, in the current climate I have decided to dive into how to use a whole meat or a less chosen meat to feed your family. Over the next few entries I will be posting recipes that I personally use to feed our family of 7 a total of 4 dinners with one 12lb ham.
Let’s get started!


Preparing a ham is super easy. The hardest part is planning ahead to allow enough time in the oven.
I started with the whole 12lb ham and followed the directions that came with the ham. *Yes, this is a store bought ham. I didn’t have a farm raised ham at home and with COVID-19 I was not traveling to our normal source of pork*
It took approximately 3.5 hours to warm through covered in the oven at 250 degrees.
I uncovered it 30 minutes prior to the ham being finished and glazed it repeatedly with a brown sugar honey glaze. There is nothing special to the glaze. I mix the honey and brown sugar to a gloopy consistency and slather it on with a brush. More honey less brown sugar. It melts and gets in-between all of the slices… yummy!!
The ham turned out perfect. I love a nice spiral sliced ham as the ham slices are a perfect size to cut and serve as well as use for ham sandwiches and easy to cut up later for soup.
We paired our ham dinner with a brown sugar apple and butternut squash medley. This recipe has become a favorite in the fall when we have plenty of both from the farm. My kids often believe the orange colored butternut squash is sweet potatoes. This works for my youngest as, like most young children, think squash is terrible. Sweet potatoes however, he approves of. Mom win!


A note ahead of time. Butternut squash is a firm vegetable and can be difficult to peel, cut and cube. I will let my children help with peeling and cutting apples but, I do the butternut squash as it takes a bit more effort.
We started with a small butternut squash and 3 gala apples. I peeled, cored and cubed both the apples and the squash.
Place the cubed apples and squash into a baking dish. The squash and apples will reduce down while baking so pack that dish full! Then mix the following items and spread on top of the squash and apples:
1/2 packed cup brown sugar (I use just a little more than 1/2c)
1/4 cup of melted butter
1 tablespoon flour
1 teaspoon salt
1/2 teaspoon nutmeg or allspice.
Bake covered at 350 degrees for approximately 45min - 1 hour.
I finished our ham dinner with a simple salad filed with lots of cucumber, cherry tomatoes, cheese and mixed lettuce.
In total the entire meal did take patience as the ham does have to warm through for a significant amount of time but, the prep work is minimal and your family will thank you for a well put together family dinner.

A few final notes, I recognize that both the ham and squash apple bake call for brown sugar. The amount used is up to you and your tastes. An alternative to brown sugar would be local raw honey if you have some available.
I typically bake a ham on a Saturday and then get up a little early on Sunday before church, to use part of the remaining ham to put together my second meal using left over ham. Ham and Scallop Potatoes, a family favorite. I never have a single scoop left of Ham and Scallop Potatoes.
Look for part 2 of, Using a Ham to Make Four or More Meal, to be posted soon!
Stay Safe and Healthy and At Home!
If you liked this post please subscribe below to be notified of new posts and receive farm news and updates!
Peeling Hard Boiled Fresh Eggs
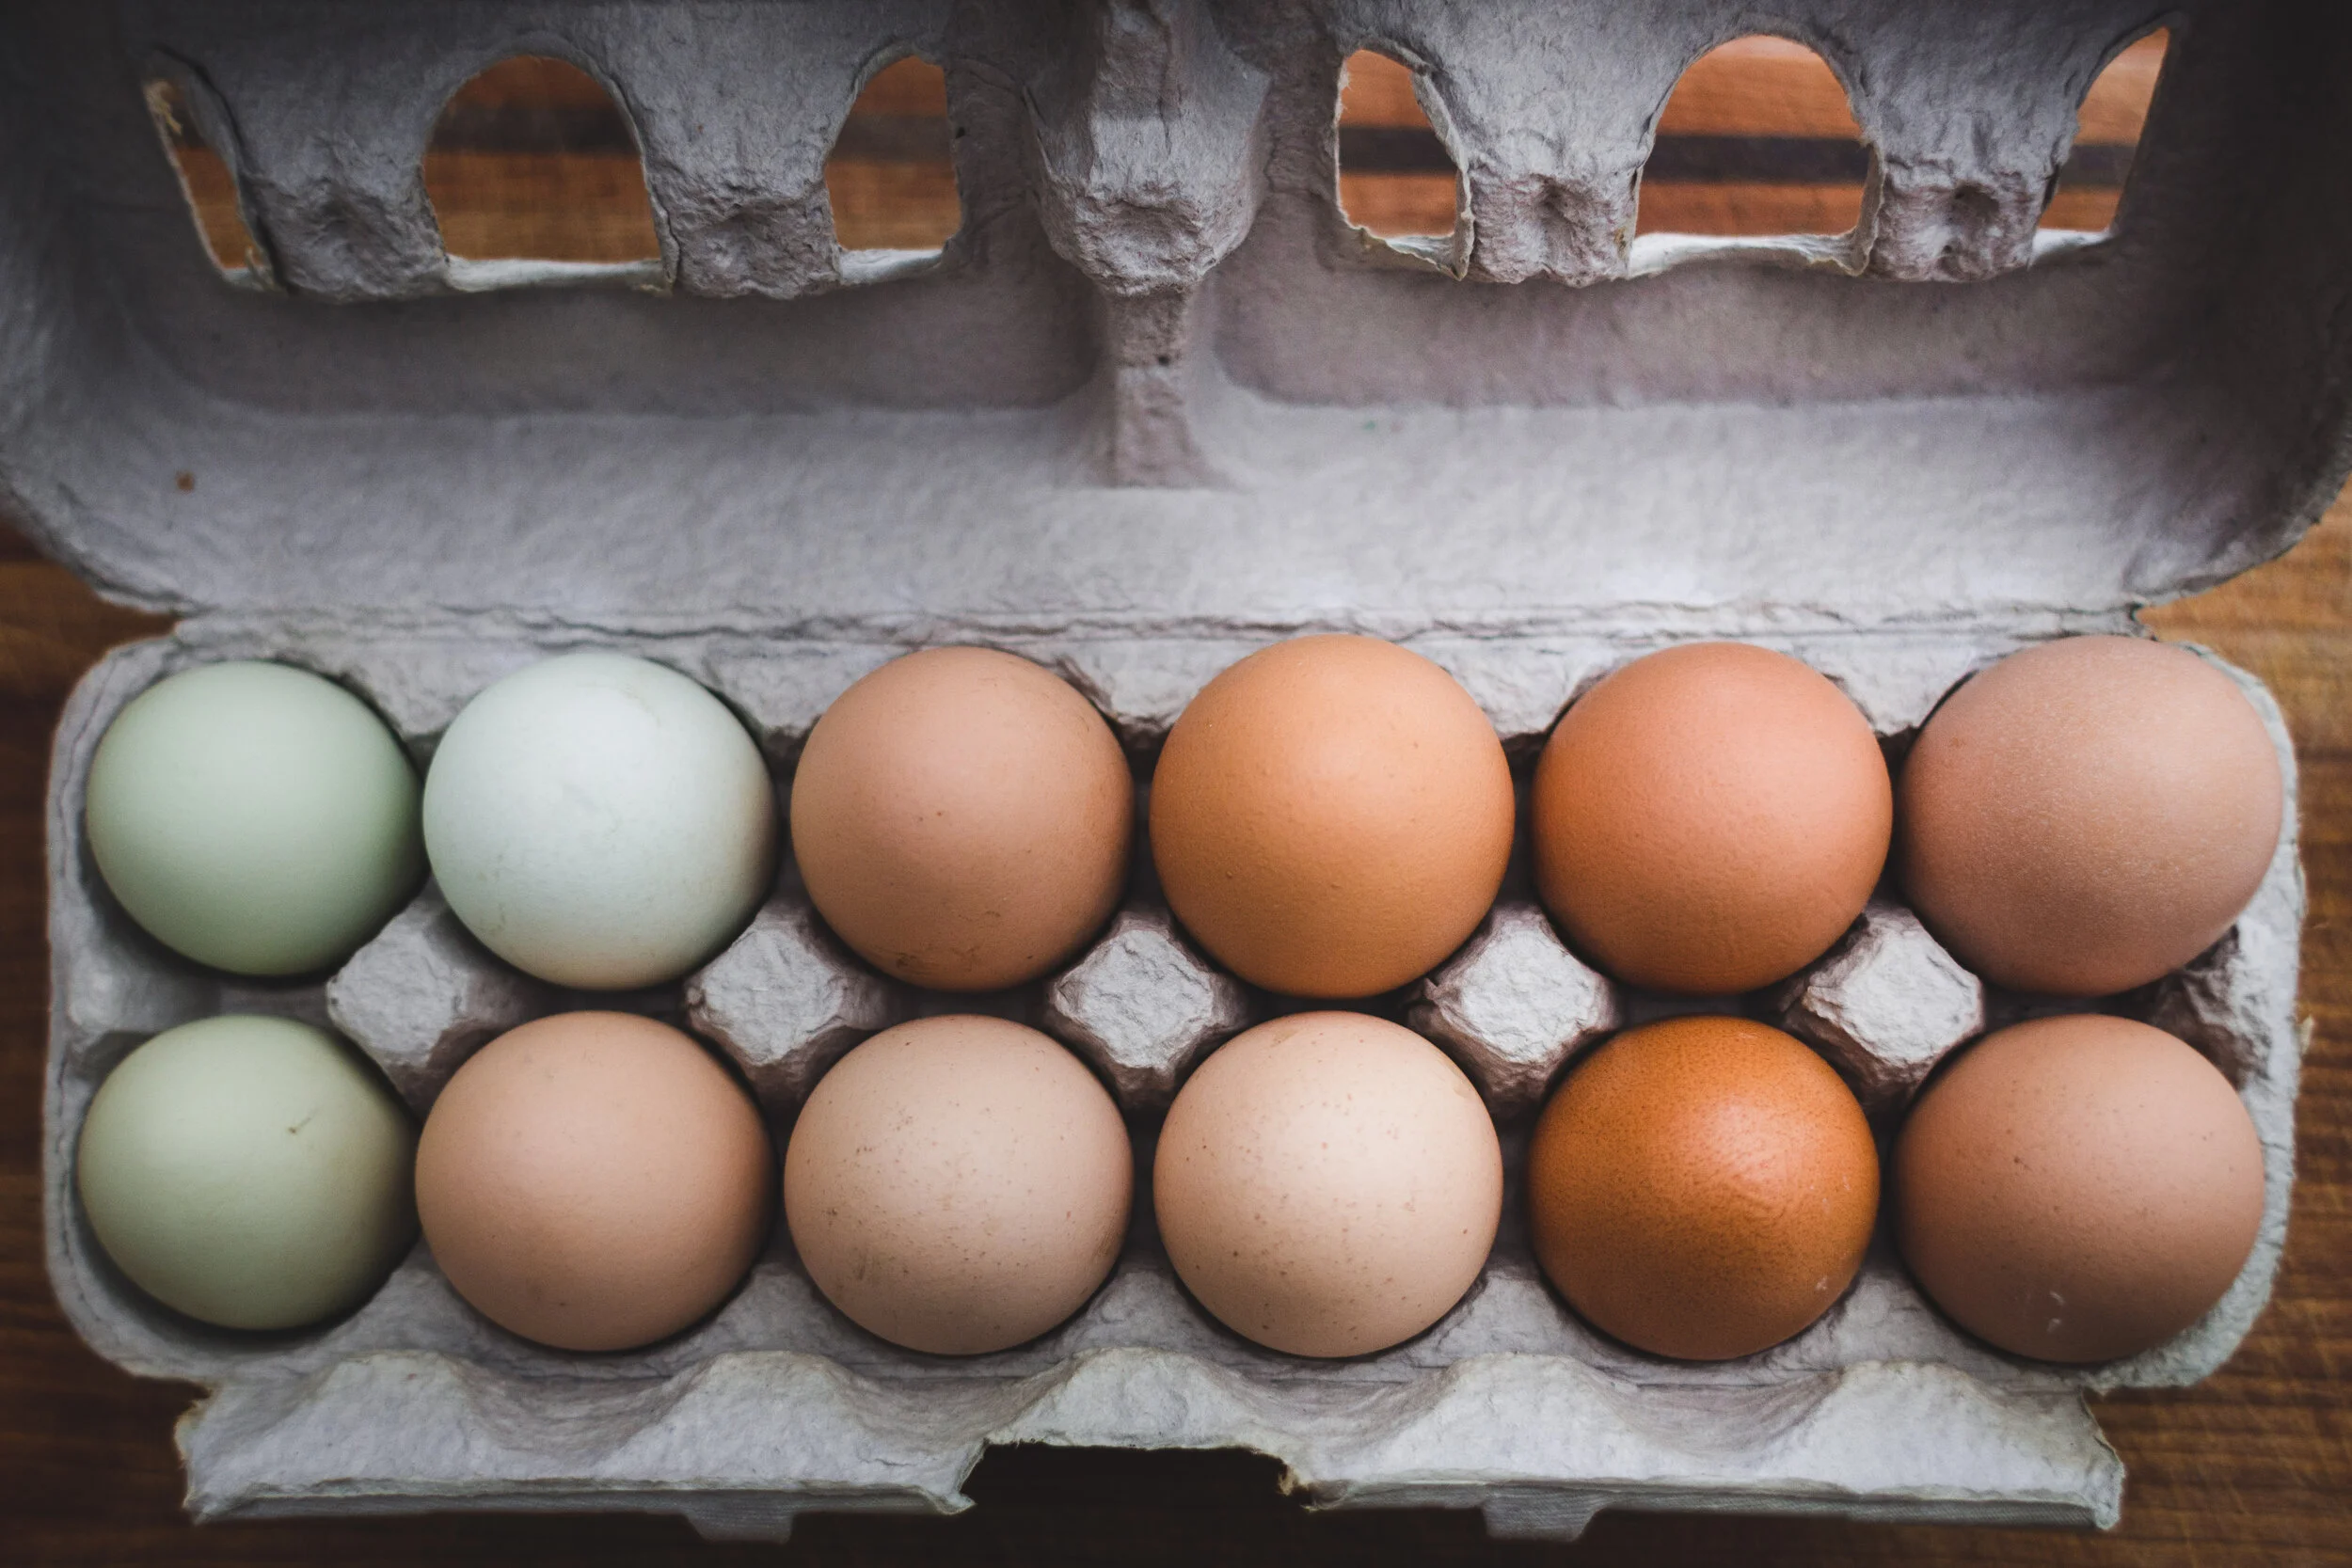
I love fresh eggs…. I know there are a lot of things I love. Every post is full of my love for something but, I mean it when I say, I love fresh eggs. Multi colored shells with rich dark yellow yolks full of flavor in the morning with a side of black coffee gives me all the feels of warm yummy goodness.
I love fresh eggs…. I know there are a lot of things I love. Every post is full of my love for something but, I mean it when I say, I love fresh eggs. Multi colored shells with rich dark yellow yolks full of flavor in the morning with a side of black coffee gives me all the feels of warm yummy goodness.
Do you know what I hate about farm eggs? Trying to peel them after I hard boil them. Peeling them can be a nightmare. Chunks of egg coming off with the shell leaving me with two-thirds of an egg. This doesn’t make it easy to enjoy a breakfast of hard boiled eggs or allow me to present nice looking deviled eggs for a party. Quickly all of those feelings of warm yummy goodness quickly turn to frustration as I am firmly telling my hard boiled eggs to cooperate and quit falling apart while I am peeling.
My frustrations with peeling eggs eventually sent me on a quest. A quest to find how to obtain a nicely peeled fresh egg more times than not. I’ve tried numerous ways to perfect the peeling process.
I have refrained from using eggs less than three days old, I’ve tried adding baking soda to the water I use to boil the eggs, I’ve tried a longer cook time, using only large or extra large eggs and steaming the eggs. Some worked better than others but, none of these options were as successful as………using a spoon.

Not long ago I had over committed myself with kids events, farm work and meetings…. I know, shocking isn’t it? I had agreed to take scones for a crowd of 40+ and realized at 3:30p, the meeting started at 6:00p and was 30 minutes away, that I did not have enough scones already pre-made and I did not have all the ingredients needed to make scones. What I did have was two dozen fresh eggs.
I had the ‘spoon method’ on my list of ways to try to peel fresh eggs. I’m so glad that this method was the next on my list as I set about peeling.
The Boiling Process:

Disclosure: I forgot to take a couple of pictures.. such as the eggs actually boiling but, I am hoping most of you know what that looks like!

Fill your pot with hot water and a teaspoon or a little more of salt. (the amount of salt is dependent on how much water.) There is not set amount… I eye it and throw it in.
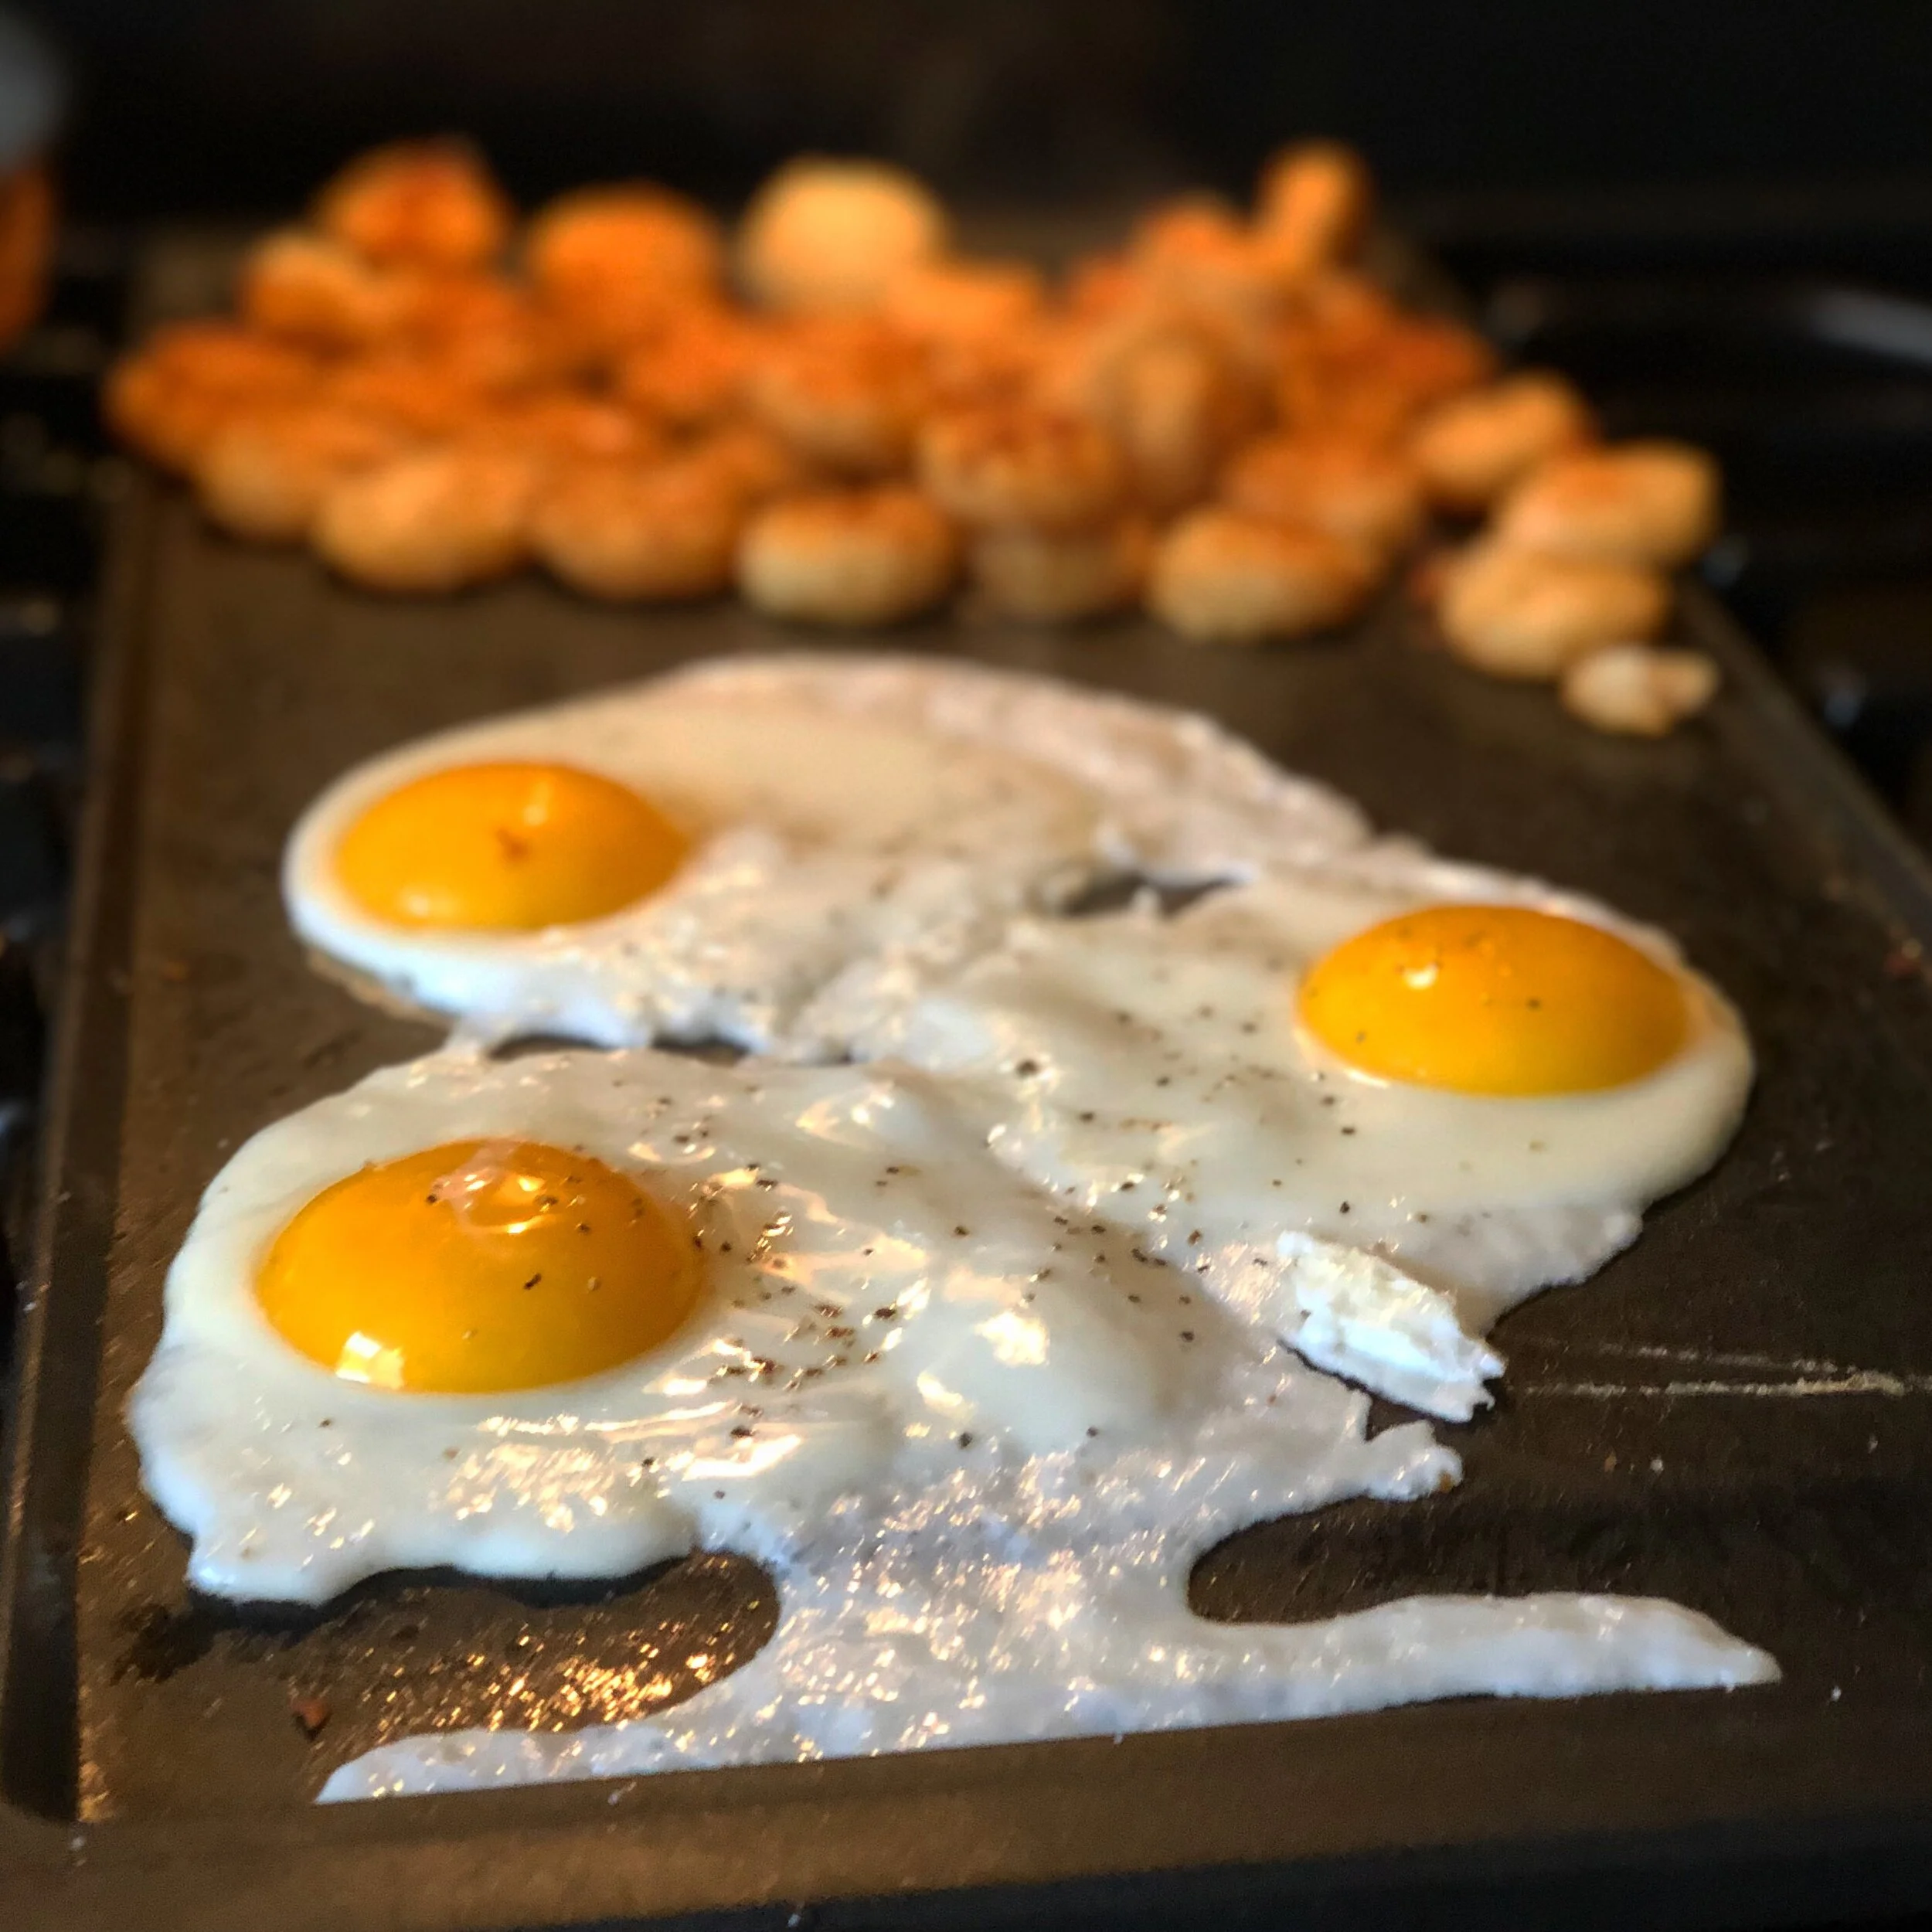
Allow the water to come to a hard boil and then carefully set your eggs into the water.
Turn down the heat and continue to simmer the eggs for 15 minutes. I also lightly cover the pot but, not seal it closed.
Once the 15 minutes has ended move the eggs to a bowl of ice water. This stops the cooking process and allows you to handle the once boiling eggs.


The Peeling Process:


Hold the egg round end up. This is the end that will hold the air sack of the egg. Use the back of your spoon and tap the space as shown in the images above.
Turn your spoon over and use the edge to pull back some of the cracked shell.
Work the end of your spoon into the opening of the egg and follow the contours of the egg between the shell and the white of the egg.
Pull the spoon up against the shell to remove the shell from the egg.
Work your spoon around the entire egg lifting and discarding the shell as you go.
Discard the shell and move on to the remainder eggs….
Enjoy your fresh peeled hard boiled eggs!


I will mention, the first two eggs were ‘practice' eggs. It took me a moment to figure out how to utilize the spoon best and which edges of shell to start with. The spoon didn’t take large chucks of the egg off like other methods I have tried previously had. I have used this method multiple times since and have been pleased with the results and I hope you are too! Let us know how this works for you!
Did you like this tutorial? Subscribe below to receive updates, more tutorials, recipes and product availability!

For The Love Of....
At the end of every market season we are always exhausted. We, or at least I, am looking forward to tucking in for winter and hibernating until spring. In reality there is no hibernating but, the beginning of another kind of busy season with school sports, the holidays and preparing for cold weather
At the end of every market season we are always exhausted. We, or at least I, am looking forward to tucking in for winter and hibernating until spring. In reality there is no hibernating but, the beginning of another kind of busy season with school sports, the holidays and preparing for cold weather.
The change and break is always welcome. I always chuckle however, at how quickly my desire for a break changes back to looking forward to market season almost immediately after Christmas.
I always joke that being a farmer is like being in labor . At the start of the season I am always full of hope and wonder, just like how I felt when I was pregnant. By the end of the season I am exhausted, hot, tired and swearing off farming ever again which, coincidently is how I felt during labor as I proclaimed, “I will never have another baby again!”
Like the desire to have another baby not nearly long enough after the pains of labor, I find I am always looking forward to another season of farming rather quickly after vehemently swearing it off only months earlier. How quickly I forget the heat, exhaustion, physical labor and body aches when I am diligently starting heirloom tomatoes seeds in early January.

There is a love to market farming. A love that is deep and full of connection to the land, the community and our customers. A love that drives us into this that I find hard to describe in words. The driving force is enough to motivate us to continue at 3am when the wood stove needs more wood to keep the tomato plants from freezing in February. (Full disclosure that’s Matt’s job, not mine as seen in the above image, although it’s not 3am there)
The love is enough to motivate me to whisper sweet things to our tender tomato plants to encourage growth. The love is enough that days and weeks later I am diligently weeding those same tomato beds and still whispering sweet things as I weed….just so we’re all clear, weeding sucks…….like really sucks and for those interested actual whispering does happen.
All of this love for farming leads me to another kind of love… the love of our family. Farming is not always in the ‘love’ category for our children like it is for Matt and I. Our kids have lots of other loves however, on days that we need the help our kids have come through on many occasions although sometimes begrudgingly. On those days I have left the field at the end of the day feeling drained and yet euphoric knowing that we have created the best kinds of memories and experiences with our kids. We didn’t leave the farm, we didn’t spend any money and we didn’t include any electronics but, what we did do is work together to accomplish something. We got dirty, we stacked endless amounts of wood, hauled compost, broad forked, stretched heavy silage tarps across beds, planted and planted some more. We worked hard and we bonded together through laughter, conversation, arguments about who is working harder than another and the occasional goofy photo session.
If Matt and I are thankful for one thing on the journey of being market farmers, it’s for experiences like this, for memories like this and for families like ours.


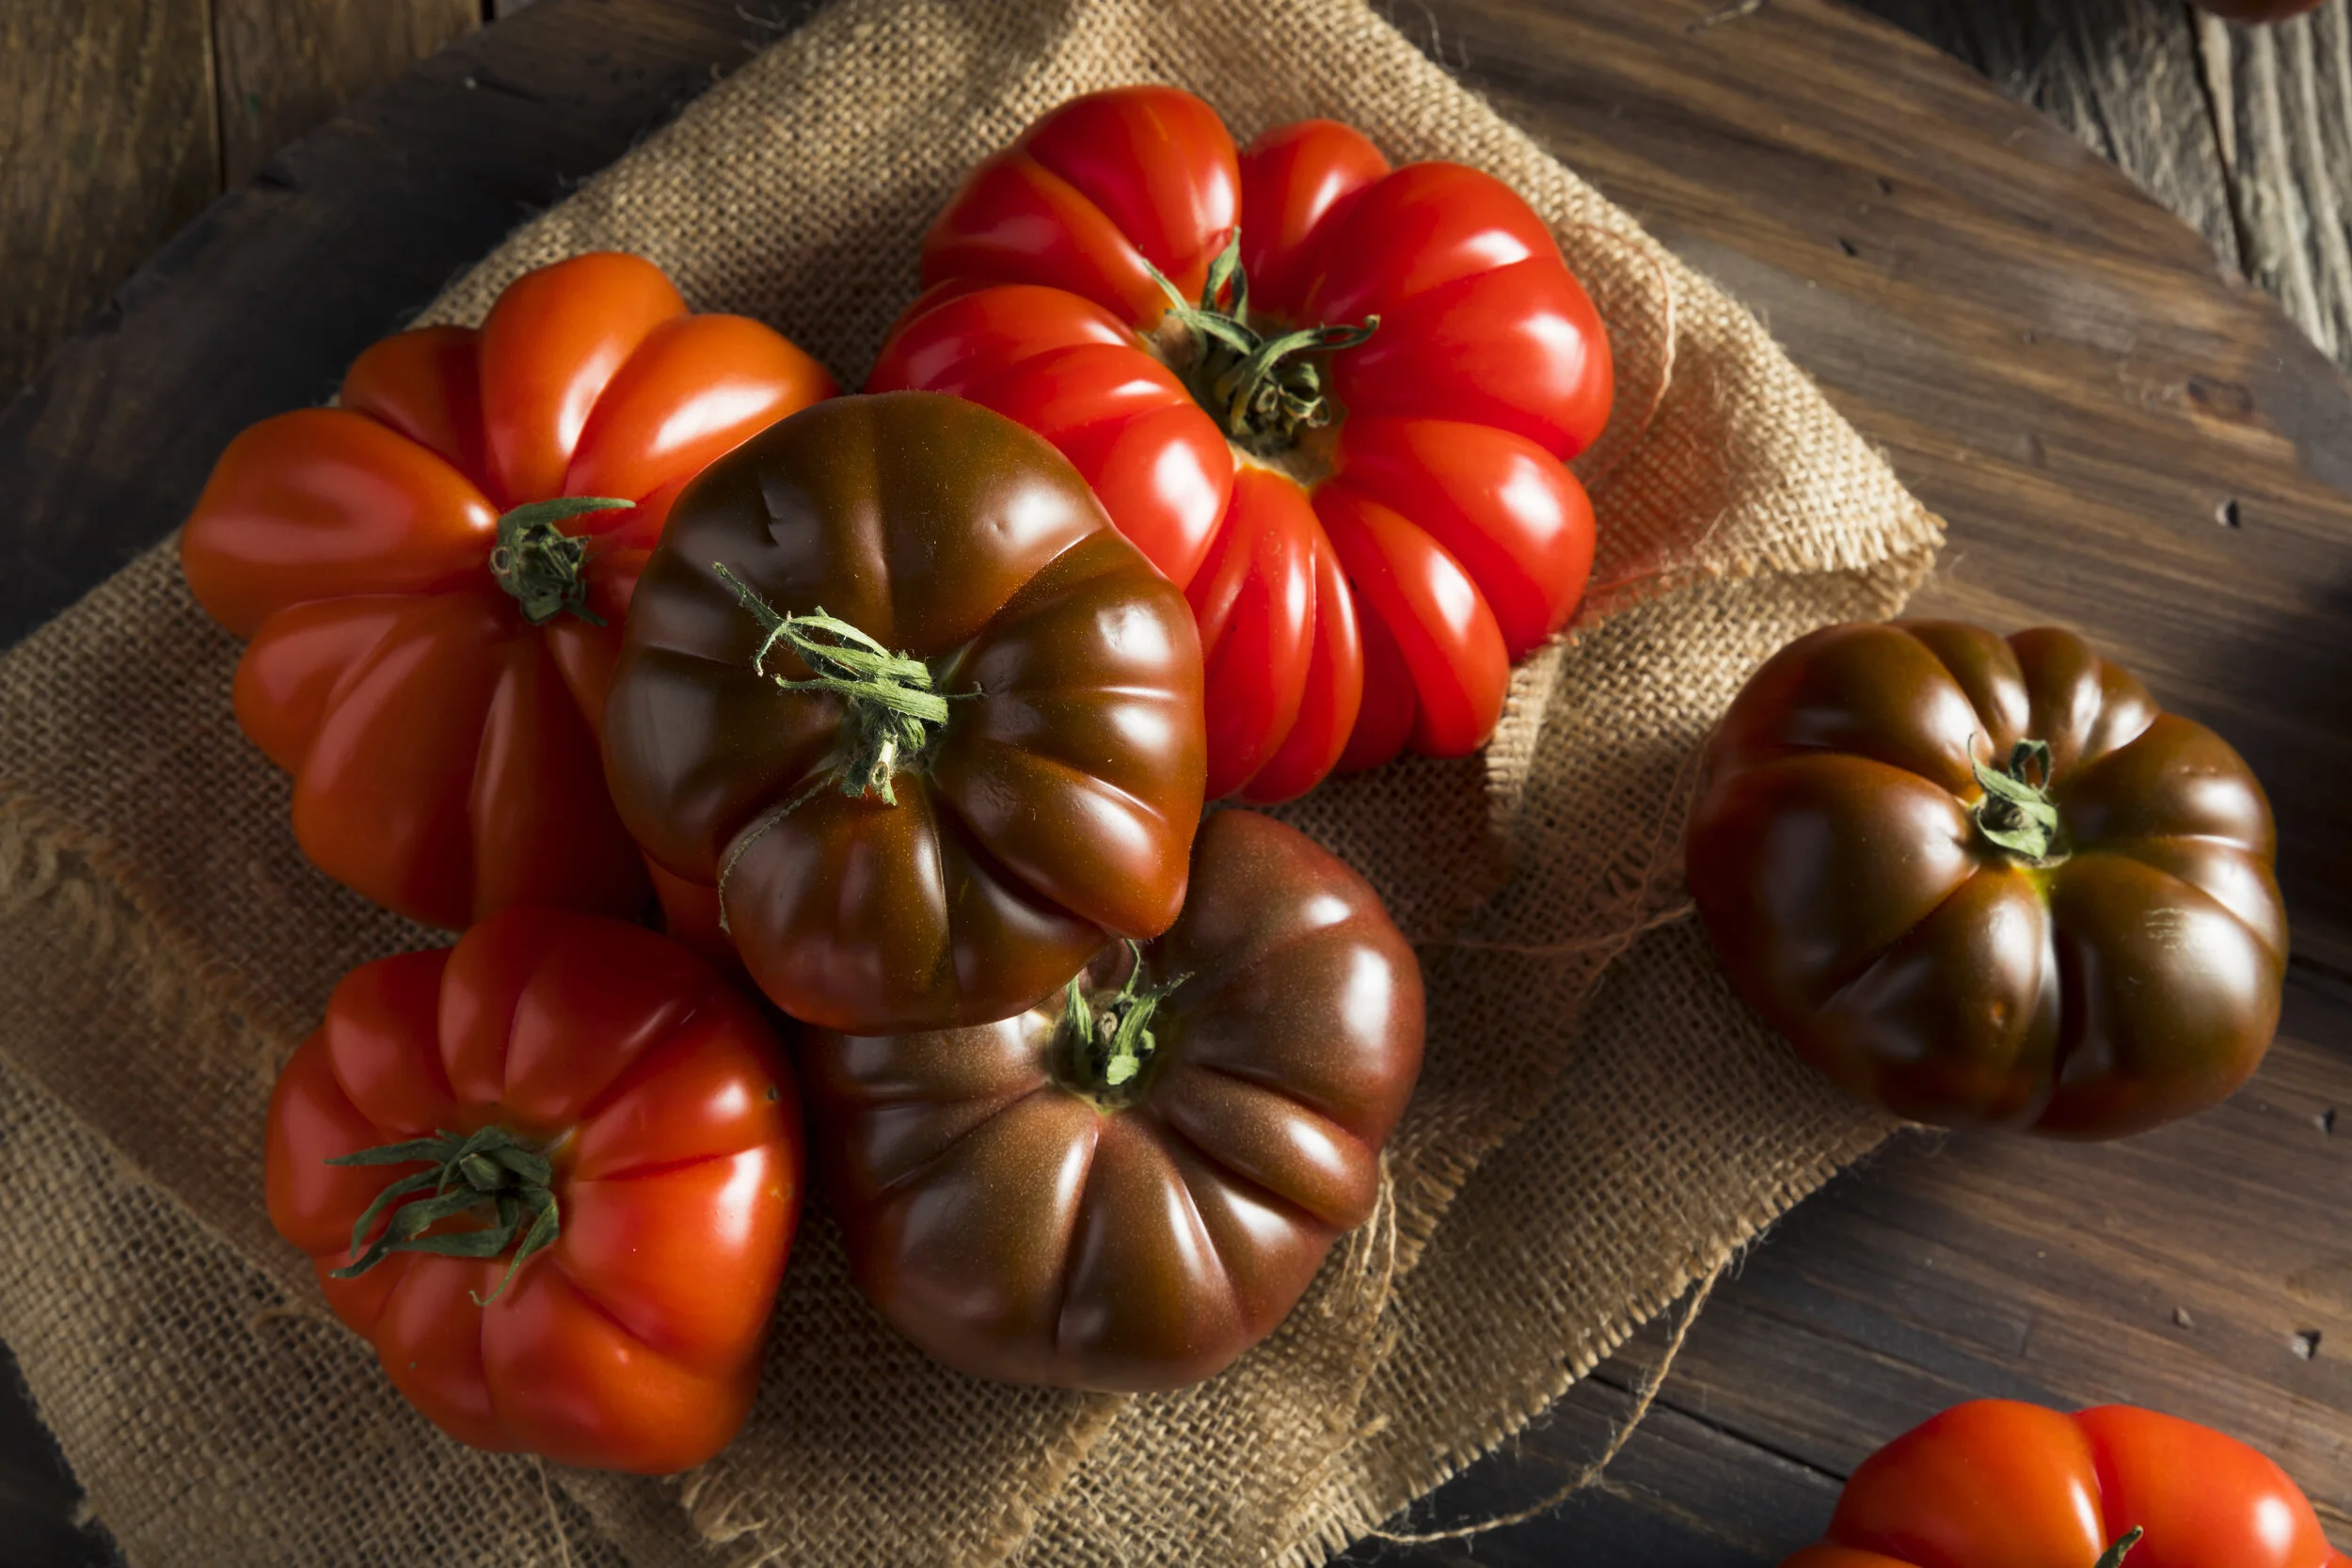
Heirloom Tomatoes: What's All The Hype?
Let’s start with, what's an heirloom? According to the Oxford Dictionary, heirloom plants are varieties which were commonly grown in the past, but are no longer grown as commercial crops. (1) Did that definition make things crystal clear for you? Me neither.

Cherokee Purple
Let’s start with, what's an heirloom? According to the Oxford Dictionary, heirloom plants are varieties which were commonly grown in the past, but are no longer grown as commercial crops. (1) Did that definition make things crystal clear for you? Me neither. I decided to search for the definition of heirloom tomatoes. Wikipedia states, an heirloom tomato is an open pollinated, non-hybrid heirloom cultivator of a tomato. (2) To sum this up an heirloom is an open-pollinated plant (the flowers are pollinated by birds, insects or wind) that passes on the same characteristics and traits from the parent plant to the child plant, unlike a hybrid. To add to this the general rule in the “gardening world” is an heirloom variety is at least 50 years old.
Summer... as I write this in the middle of winter, summer gives me all the feels. Warm sun, summer produce, fresh cut grass, farmers markets... we love summer. One of my favorite parts of summer is the heirloom tomatoes. Thinking of the colors, flavors, different sizes and irregular shapes releases feelings of happiness and longing. Eating them on burgers or alone with salt and pepper. We love them in caprese salad or chunky fresh salsa. I think I know your next question…If they're so great why don't they sell them in Wal-Mart? Stick with me and keep reading.
With the increase use of grocery stores in the 1950’s, many farmers and store owners quickly realized that many of the traditionally grown varieties of tomatoes did not hold up during transport or during long periods of being on a shelf. Bruising, short shelf life, irregular shapes, sizes and colors were not appealing to shoppers. Traditional tomatoes also didn’t hold up to the demand for all year access to produce that otherwise is seasonal. This started the idea of breeding the perfect tomato by crossing one tomato with another and continuing this process until the perfectly round and perfectly red variety was created. These new varieties called hybrids could handle the stressors of travel, stay on the shelf longer, and be the perfect size and color, but flavor gradually became lost.

German Johnson
When I began looking into what gives heirloom tomatoes a superior flavor and complexity compared to the store varieties I was expecting to find a specific scientific answer(s). I had hoped to find information regarding their genetic makeup, if growing zones mattered or if a certain type of soil is needed. Do you know what I came up with? Opinions. Lots of opinions. Instead of information about heirlooms I instead found plenty of discussions regarding why store tomatoes are tasteless. In 2012 an article was published in the journal of Science regarding a gene mutation that was specifically bred into the commercial tomato. This mutation inactivated the gene that plays an important role in producing the sugar and aromas that are the essence of a fragrant, flavorful tomato. (5) Perhaps why heirlooms have superior flavor isn’t the question we need to be asking. Perhaps the question is, why have we altered other tomatoes to the to the point of not having any flavor?

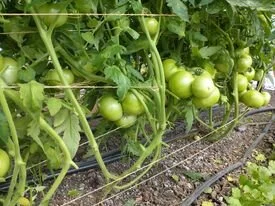
Buying tomatoes from a local farmer regardless of variety also plays a part. Harvesting a tomato at its peak when it is ripe is crucial. Often commercial varieties are picked early, refrigerated, allowed to ripen on the way to the store and in some cases sprayed with Ethylene gas to give the tomato a ripened look. Almost all of the tomatoes we sell at the market are picked that morning or the night before. They remain on the vine for as long as possible allowing them to take in nutrients and sugars from the plant. This allows tomatoes to be eaten as fresh as possible and at their peak flavor; vine to table in 24-48 hours.
I can tell you if you've never had an heirloom tomato, then you've never tasted a real tomato. I encourage you to try a tomato from the store and compare it to an heirloom tomato grown locally and picked when ripe and find out for yourself. If you are unsure where to get your heirloom tomatoes I may know a farmer who can help you with this.
On a side note, if you are interested in learning more about Ethylene gas and tomatoes check out this article. Question Your Tomato: Beware of Artificial Ripening.

Organic, Locally Grown, Pesticide Free, Grown Naturally.... What does all this mean?
Are you confused by all of the different marketing ploys touting Grown Locally, Organic, Grown Naturally or Pesticide Free? Well…. I was. At times I might still be confused by the new slogans or catch phrases that advertising firms are coming up with. I am hoping I might be able to shed a little light on what each of these means and what how I try to navigate when I’m at a unfamiliar Farmers Market.
Are you confused by all of the different marketing ploys touting Grown Locally, Organic, Grown Naturally or Pesticide Free? Well…. I was. At times I might still be confused by the new slogans or catch phrases that advertising firms are coming up with. I am hoping I might be able to shed a little light on what each of these means and what how I try to navigate when I’m at a unfamiliar Farmers Market.

Lets start with Pesticide Free. This is a term generally used when crops have not been treated with any synthetic (human-made) chemicals that are used in controlling insects, weeds, or disease-causing organisms. (1) While this term is widely used, it isn’t governed by any agency to verify the farmer claiming to be Pesticide Free, is in fact pesticide free. This allows anyone to use this label whether it is truthful or not. While I personally want to purchase and consume pesticide free foods, I have to truly trust my farmer and their practices as anyone could use this as a way to falsely market their products.

Naturally Grown and Certified Naturally Grown are two different terms I have seen at markets and grocery stores. The word “natural” is used with little to no oversight. I have yet to find a true definition of what the term natural entails when used regarding food. My personal opinion is that this term is used when food products are grown as “natural” as possible. Well…what does that mean? It leaves the interpretation of the term natural, up to the farmer. His/her interpretation can often differ then how the customer interprets. It wasn’t until I researched Certified Naturally Grown that I found guidelines that a farmer must adhere to in order to label their products with the CNG label. Livestock farmers must feed non-GMO, and their feed must be grown without synthetic fertilizers, herbicides, or pesticides however, it doesn’t have to be organic. Certified Naturally Grown farmers don't use synthetic fertilizers, pesticides, herbicide, or GMOs, just like certified organic farmers. (2) I have personally purchased and consumed foods advertised as naturally grown. I trust my farmer(s). If I didn’t know my farmer or I am looking into another farm to add something to our plate I would either:
Educate myself prior. I would know the requirements for the terms being used. I don’t let words such as hybrid, greenhouse grown, hydroponics or others deter me. I establish a baseline of what is important to me in my food. I would prepare questions I need to ask ahead of time and ask farmers their practices before I buy. Don’t be afraid! Opinions differ and that’s okay!
If I was absolutely in a place where I felt like my options were “sketchy” and I wasn’t getting the right answers to my questions, I would stick to those that have the Certified Naturally Grown label or Certified Organic just to be safe. I want to add that the CNG and CO labels are not what I stick to all the time at my own markets. I have learned that often these labels are not used due to cost of participating in these programs. It doesn’t mean the farmer isn’t following the same practices.

Locally Grown… one of my favorites. We use a Locally Laid or Locally Grown label on our eggs, meats and various other items. Yet again, another term used loosely with no “real” over sight. Normally, this term is used by farmers at markets to certify that their products were grown locally. I find myself often asking, what does locally mean? Does it mean a certain number of miles from the market? Does this mean in the same county as the market? Does local mean the same thing to the consumer as it does to the farmer? So many questions and yet… still no answers. The short answer is to ask the farmer that you are purchasing from or the head market tent what their rules are for vendors to sell their items. At some markets it must be grown within 50 miles, others it is 100 miles. We have participated in markets that have strict requirements and inspections of your farm to ensure you are the person growing what you sell. We have been to others that use the honor system and never visit your farm to insure what you sell is what YOU grow and not something you picked up at a produce auction and marked as your own. (this happens a lot) As a consumer you have to decide what is local enough for you. Many vendors might only be 10 miles from the market, others might be more. It is up to you to educate yourself and decide how local is local for you. On a personal note, local is important to me. Less carbon footprint with local fare and I have found it to be the most flavorful. I will also add that defining the term local is important on some products more than others, one being honey. (future blog post is in the works about why honey is more important to me regarding locality than other crops)

Lastly, Certified Organic. This term is regulated by the USDA. Any food products labeled organic must contain at least 95% organic ingredients with no synthetic growth hormones, antibiotics, pesticides, biotechnology, synthetic ingredients or irradiation used in production or processing. (3) Farmers using the Certified Organic label must adhere to strict regulations and inspections. I have been to several farmers markets and I have seen farmers using only the word organic without the certified term being attached. When I have inquired about the organic status the responses have been mixed. Either, yes they are certified organic or farmers believe they can use the organic label as long as they use organic methods. I have a tendency to shy away from those that use the organic label without actually being certified WITHOUT further conversation. As you get better at speaking to your local farmers you will quickly figure out who is the “real deal” and who isn’t.
If you have stuck with this post this long I am sure you are wondering how we label our products. The short answer is, we don’t….. or at least we label minimally. We do label with Locally Grown/Laid as we meet the requirements to sell at the farmers markets, which for our market is 50 miles or less. If a customer asks, we do discuss our practices, which can vary from one crop to the next. We use as much insect netting, hand picking, neem oil, insecticidal soap and other organic methods as we can. We have run into times where we have lost entire crops or have had serious damage to trees and their fruits because of invasive species. We try our very best to be good stewards and utilize every option before we have to spray with anything other than organic sprays. I can 100% say the following,
Not every kitchen scrap or banana peel thrown to our chickens is organic.
Not every ton of compost we haul in is organic.
Our farm is surrounded by conventional farms who are not organic. We do participate in a drift program which requires row crop farmers to inform us prior to spraying allowing us time to take precautions against drifting, but the method isn’t perfect every time.
We can’t encourage you enough to educate yourself, talk to your farmer, visit their farm, ask questions… heck make a friend out of them. Know your food, know your options and sign up below for our farm updates….. you won’t regret it!